

Best Stainless Steel Lag Bolt Options for Outdoor Projects
2026-10-27
Outdoor projects demand fasteners that can handle moisture, temperature swings, and heavy loads. Stainless steel lag bolts are the go-to choice for many builders, but sorting through the options can be tricky. That's where Wanluo comes in—offering a curated range that balances strength and corrosion resistance. Read on to discover the best picks for your next build.
Salt Spray vs. Rain: Picking the Right Alloy
Salt spray and rain are both wet, but they attack metal in different ways. Salt fog from coastal zones or de-icing roads delivers a concentrated chloride load that penetrates passive oxide films, triggering pitting and crevice corrosion within hours in the wrong alloy. Rain, especially inland, is far less aggressive—it dilutes and washes away contaminants instead of depositing them. The real risk with rain comes from long wet-dry cycles and acid rain pollutants, which slowly undermine coatings and edges.
For stainless steels, the distinction drives alloy choice. 304 can handle ordinary rain exposure without issue, but near the ocean or on salted highways it pits quickly; that’s where 316 with its molybdenum addition pays off. In aluminum, 5052 and 5083 naturally resist marine chloride attack, while 6061 needs a protective coating or anodizing if salt spray is frequent. Galvanized steel works well in rain but its zinc layer is consumed faster by salty air, so heavier coatings or a switch to aluminum or stainless becomes the better long-term call.
Don’t treat salt spray testing as a perfect stand-in for rain service. ASTM B117 accelerated tests are useful for ranking alloys, but they don’t reproduce the wet-dry cycling or UV exposure that real rain brings. Match the alloy to the dominant risk: if chlorides are part of the picture, err toward higher molybdenum stainless or marine-grade aluminum; if rain is the main exposure, a standard alloy with proper drainage and occasional maintenance often outlasts expectations.
When a Hex Head Beats a Square Drive
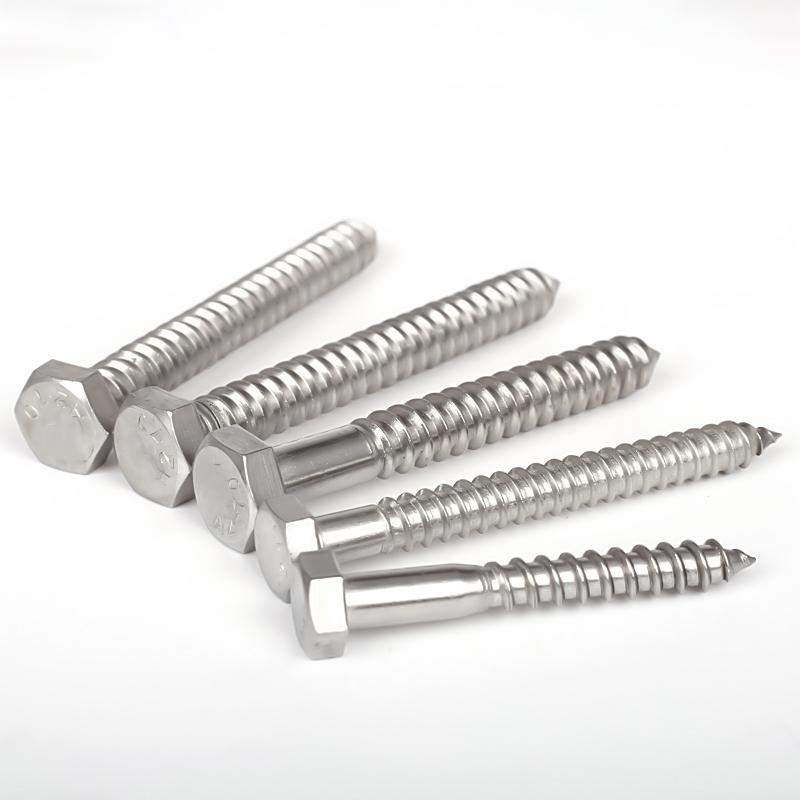
There are times when a six-point recess simply works better than a square one, and the most obvious is angled access. A hex bit or key can engage a fastener even when you can't line up straight on it. The ball-end hex key takes this further, letting you spin a bolt out from a slight offset. A square drive demands near-perfect alignment, which is fine on a production line but miserable under a dashboard or behind a suspension arm.
Hex heads also earn their keep once a fastener has been abused. A rounded-out square recess is usually a lost cause because there's nothing to grab. A rounded hex, on the other hand, can often be persuaded with a slightly oversized Torx bit, a hammered-in Allen key, or a left-handed drill bit. Even rusted hex bolts tend to respond to a six-point socket, which spreads load across flat faces rather than corners. That resilience matters for anyone dealing with old machinery or road salt.
Then there's the matter of what's actually in your toolbox. Nearly every multi-tool, folding key set, or socket rail includes hex sizes, while square drive bits are regional specialists. In a pinch, a hex bolt can be turned with an adjustable wrench or locking pliers. The same can't be said for a recessed square drive buried in a wooden plug. That universality, combined with angled access and damage recovery, is why hex heads continue to dominate in repair work rather than assembly lines.
The Case for Buying Bolts with Coarse Threads
Most people grab fine-thread bolts by default, assuming the tighter pitch means a stronger hold. In practice, coarse threads win in most everyday applications because they resist stripping far better under repeated assembly and disassembly. A coarse thread has deeper, wider grooves that leave more material between each crest, so it takes a lot more abuse before the threads begin to shear or gall. If you've ever had a fine-thread fastener seize halfway in and turn into a rounded mess, you already know the pain of choosing the wrong pitch.
Another overlooked advantage is speed and forgiveness during installation. Coarse threads engage quickly, requiring fewer turns to seat the bolt fully. That matters when you're working in tight spaces, over your head, or with a limited tool swing. They also tolerate dirt, paint, and minor burrs far better than fine threads, which tend to bind on any debris. For wood, plastics, or softer metals, coarse threads bite harder and hold without needing a tapped hole to be absolutely perfect.
Finally, coarse-thread bolts are usually cheaper and easier to find in the exact length and grade you need. Hardware stores stock them in bulk, and because they're the standard for construction and automotive work, you won't waste time hunting for a specialty replacement. Unless you're dealing with thin-wall tubing or precision adjustment mechanisms where fine threads genuinely shine, the coarse option gives you a more forgiving, durable, and practical fastener for the job.
Sizing Lag Bolts for Load-Bearing Outdoor Frames
When picking lag bolts for a load-bearing outdoor frame, don't just grab whatever is on the shelf. The diameter needs to match the thickness of the lumber you're joining, but more importantly, it has to handle the shear and withdrawal forces acting on the structure. For typical 2x lumber used in pergolas or raised decks, a 3/8-inch or 1/2-inch lag bolt is a solid starting point, but if you're spanning longer distances or hanging heavy swings, step up to 5/8-inch. Always check the bolt's shear strength against the expected live load plus dead load, and remember that outdoor exposure means you'll want hot-dipped galvanized or stainless steel to avoid rust weakening the connection over time.
Length is just as critical as diameter. A rule of thumb many builders follow: the lag bolt should penetrate into the receiving member at least half its total length, but for load-bearing joints, you want full thread engagement in the main structural piece. For instance, if you're bolting a 2x6 rafter to a 4x4 post, a 4-inch lag bolt gives you about 1.5 inches of grip in the post after passing through the rafter and any washers. If the frame will experience uplift from wind or shifting soil, go longer rather than shorter, since pull-out resistance increases with embedment depth. Pre-drilling with a bit slightly smaller than the shank diameter prevents splitting and ensures the threads bite properly.
Finally, don't overlook the role of washers and placement. A thick, wide washer under the bolt head distributes compression force and keeps the head from sinking into soft wood fibers, especially on pressure-treated lumber that may still be damp. Space lag bolts no closer than four times the bolt diameter from the edge of the board and from each other. For outdoor frames that carry people or stored equipment, consider using structural screws as an alternative if you want easier installation and higher pull-out values, but if you stick with lag bolts, double-check the torque—over-tightening can strip the threads or crack the wood, while under-tightening leaves the joint loose enough to work itself apart under cyclic loading from wind or foot traffic.
Pre-Drilling Tricks That Keep Cedar and Redwood Intact
Cedar and redwood may take a screw without complaint in the middle of a wide board, but move within an inch of an end grain or a narrow edge and the story changes fast. These species have straight, coarse fibers that separate along the grain with very little provocation. A pilot hole that leaves just enough material for the threads to bite will keep the wood from pushing outward and cracking. For most deck screws, that means choosing a bit roughly the diameter of the screw shank minus the threads, then boring through the top piece and into the underlying framing member.
Countersinking matters more here than with harder lumber. A tapered bit that creates a clean cone for the screw head lets the fastener pull the board snug without crushing the soft surface. If you are working near a butt joint or a thin tail, step the pilot hole up slightly or switch to a self-centering bit with a narrow tip. Wiping the bit with a little paste wax every few holes also helps it slide through the resinous fibers instead of tearing them.
One trick that saves a lot of split boards is to pre-drill the top piece with a slightly oversized clearance hole and the bottom piece with a snug pilot hole. This lets the two boards draw together as the screw turns, rather than wedging them apart. Backing the exit side with a scrap block whenever the bit will break through an exposed edge keeps the wood from blowing out. And if a screw still feels tight after the pilot hole is drilled, back it out and clear the chips before driving again.
Preventing Rust Stains Around the Washer
Rust stains around a washer usually start with metal parts that stay damp: the leveling feet, hose fittings, or unpainted brackets on the cabinet. Swap rubber or steel feet for polyurethane cups that isolate the machine from floor moisture. If faint orange marks already show, skip bleach and use a paste of cream of tartar and hydrogen peroxide, letting it sit five minutes before wiping with a dry microfiber cloth.
A slow drip at the hose connection behind the machine often goes unnoticed until the floor starts to stain. Tighten the fittings by hand, then add a quarter turn with pliers, and place a shallow drip tray under both connections. Check the tray every two weeks during humid months, because even a small pool of water can wick under the washer and lift the floor finish.
If rust keeps returning after cleaning, inspect the washer's lower frame for unpainted screw heads or metal brackets. These can sweat and drip rust onto the floor. Coat those spots with clear automotive wax instead of paint; the wax flexes with vibration, doesn't trap moisture, and only needs reapplication twice a year.
FAQ
Zinc plating eventually wears away once moisture and UV start working on it, but stainless steel resists rust through the entire bolt, not just the surface. For anything that stays outside year-round, that difference shows up in a couple of seasons.
If you're within a few miles of saltwater, 316 is worth the extra cost because it contains molybdenum, which fends off pitting from salt. For inland projects, 304 handles rain and humidity fine without the premium price.
A 1/2-inch diameter by 4-inch length covers most post bases and heavy brackets. For lighter tasks like gate hinges or railing brackets, 3/8-inch by 3-inch is usually plenty strong while staying easy to drive.
Pre-drill with a bit sized for the shank, not the threads, and rub a little anti-seize or wax on the threads before driving. Stainless can gall if it gets hot from friction, and that tiny step prevents a seized bolt halfway in.
Yes, use flat washers under the heads, especially on softer wood like cedar or redwood. The washer spreads the clamping force so the head doesn't sink in and create a pocket where water can sit against the metal.
You can, but check the treatment type. Older ACQ or CA treated wood is corrosive to many metals, and while stainless holds up better than galvanized, it's still smart to use a barrier or choose 316 if the wood stays damp often.
Look for bulk packs from industrial suppliers or marine hardware shops rather than big-box home centers. Brands like Simpson Strong-Tie and GRK make solid 316 options, and buying by the box often cuts the per-piece price in half.
Conclusion
For coastal decks and pergolas, 316 stainless beats 304 because it shrugs off salt spray that turns ordinary fasteners into rust streaks within a season. But if your project only sees rain, 304 holds up fine and saves money. One caveat: if your structure stays damp under tree cover or near a sprinkler, step up to 316 even inland. Coarse threads are the real workhorse here: they bite deeper into soft framing lumber and reduce the chance of splitting compared to fine threads. When it comes to driving, a hex head gives you more torque control with a socket or wrench, especially on long lags where a square drive can cam out or round off under pressure.
Load-bearing frames demand more than guesswork—match lag diameter and length to the actual shear and withdrawal loads, not just what's left in the bucket. For cedar and redwood, skip the hammer drill and use a sharp brad-point bit at low speed; pre-drill a pilot hole two-thirds the shank diameter, and countersink slightly to keep the washer from crushing fibers. Finally, use a 316 stainless washer with a neoprene or EPDM gasket under the head. That barrier stops tannins from cedar bleeding into the metal and prevents the telltale dark ring around the washer.
Contact Us
Contact Person: Shane
Email: [email protected]
Tel/WhatsApp: 8613357785029
Website: https://www.wanluohardware.com